Thursday, January 26, 2017


From Back to Front

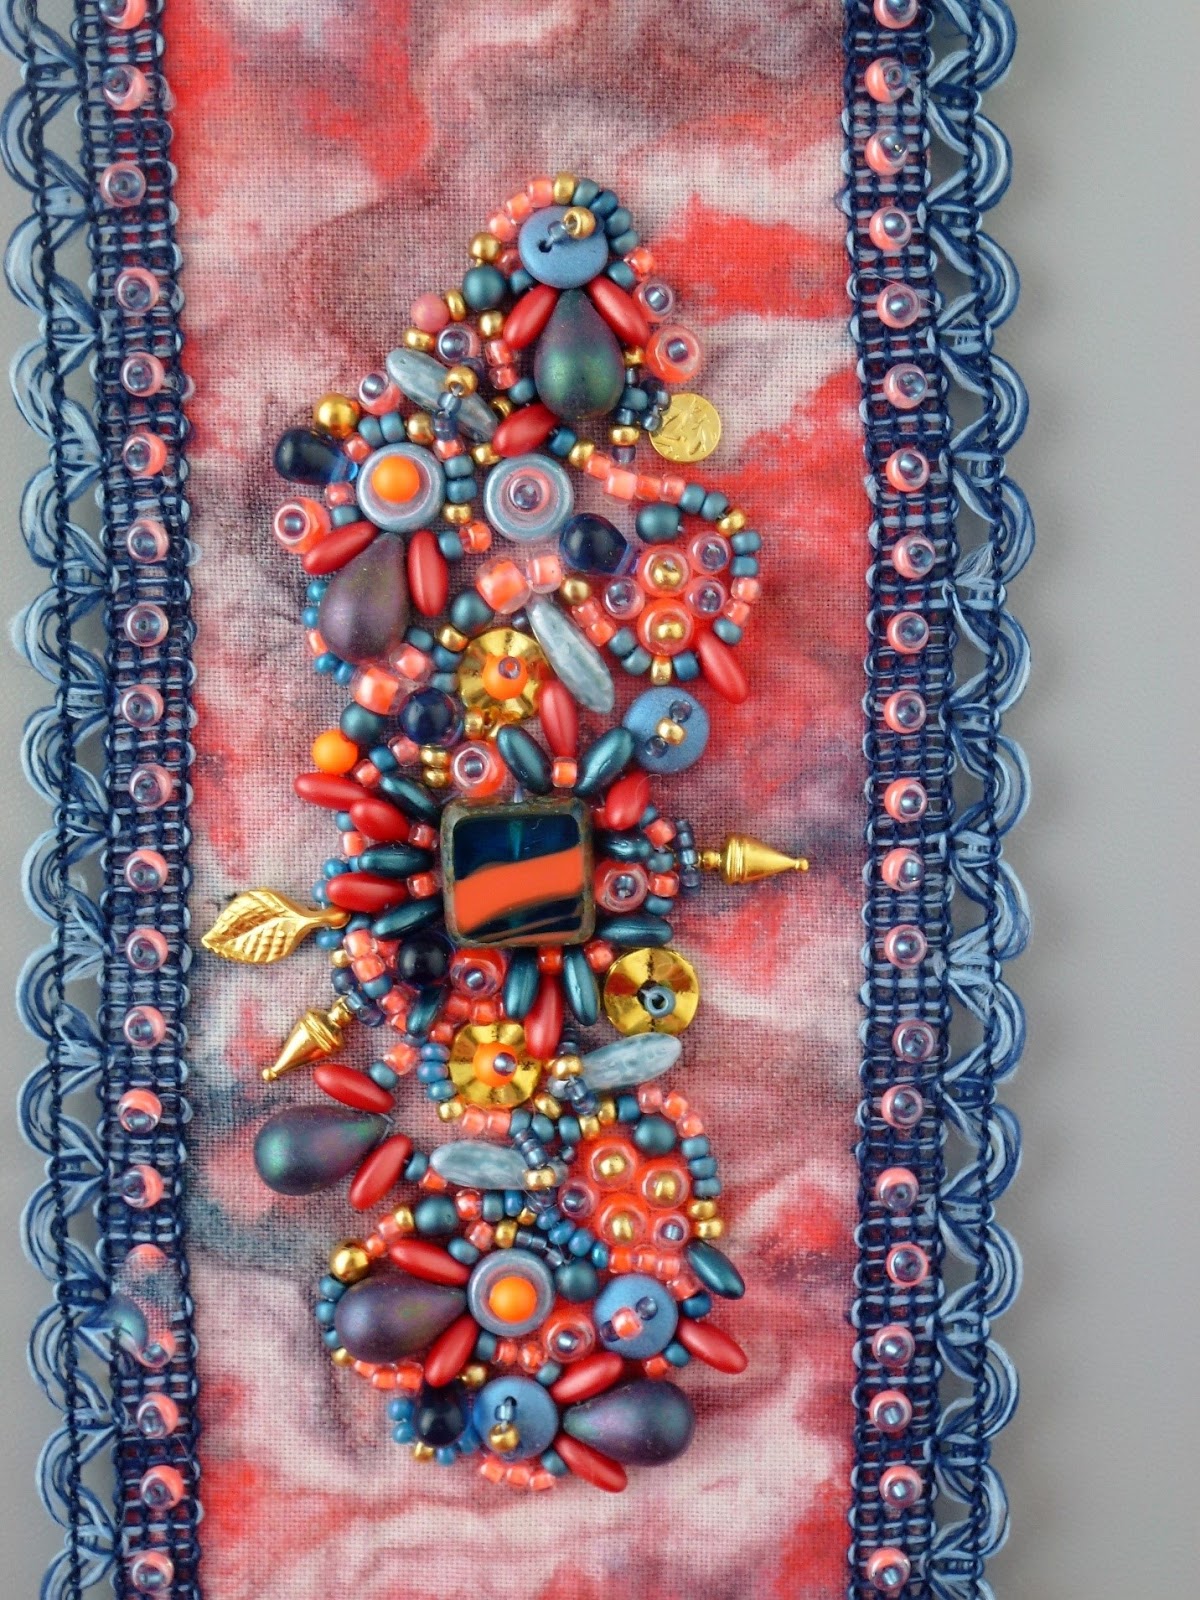
Last time I wrote about using fabric for backing bead embroidery. But I liked my friend Linda’s fabric too much to leave it back there; I wanted to bring it around to the front and feature it as part of a bead embroidery design. One of the challenges was actually stitching on the fabric, which was not all that easy to do, even using an embroidery hoop and a sharp needle. That piece did not get finished. Then I hit upon using pellon as an iron-on foundation. This worked perfectly, making it easy to cut a section of the fabric to wrist cuff size and stitch on it. 

This project also allowed me to experiment further with bead stitching in asymmetrical ways. (Don’t get me started on the division between beaders who love structure and those who love freestyle in their beadwork.)

Freeform beading can be great or it can be terrible. When it works, there’s nothing more absorbing than following where the beads want to go. When it doesn’t you sigh and mope and whine, maybe take another run or two at it which is no improvement at all, and eventually consign it to the dreaded Drawer of Unfinished Projects.

This time around I got lucky and the piece just created itself. Part of this was because I wanted the beautiful fabric to shine, so that helped restrain that bling-‘till-you-die impulse beaders are prone to overindulging.  At the time I was working on this I also came across these Gypsy Jangle bracelets while strolling and scrolling on my Pinterest app and fell in love with them: 


Now I want to run to Jo-Ann Fabric toting an air mattress and camp stove and just move in. That’s where I found the perfect trim for the edges of the bracelet.


 So, while the Drawer of Unfinished Projects may have closed on one piece, I now have a new drawer, full of nifty trimmings, fiber and fabric for designing.

Thursday, January 19, 2017


See What the Beads in the Back Room Will Have

Early in my beading life, I came across Ann Benson’s bead embroidery books and kits (you can drool over some of them here). These taught me a lot about stitching beads onto things.  I liked her sense of color, bead shape and design; I didn’t like stitching on a piece of stiff paper with the design drawn on it. I developed a technique for pricking holes in the design and using a metallic-ink pen to poke through them onto a piece of stiff felt (much easier to stitch with). Then I just connected the metallic paint dots and had my design.

What I really loved learning about was how to finish the work, using colorful fabric and fusible webbing.  This led to many pleasant hours grazing the fat quarters section of quilt shops. I now have, yes, a drawer devoted to swatches of fabric for this purpose.

A friend of mine gave me some fabric she had dyed and it really pleased me to be able to use it, as I did here for an embroidered pin.


The back should look as good as the front, eh?  All the parts should harmonize. Thank you Linda.

Thursday, January 5, 2017

Bits and Pieces

So what else can you do with pieces of stained glass? My friend Beth cut me some small squares out of this wavy celadon-green glass. I’m sure stained glass people have a very descriptive and technical name for it, just like beaders know what you mean when you say you used Chalk White Senegal Luster Picasso SuperDuos when making a bracelet. This glass looked like a little slice of ocean waves but with streaks of fuchsia and glints of chartreuse in its depths. Pink and green are colors I actually tend to work with quite a bit, even though they still make me think of the preppie fad from the early 1980s, which was all about pink and green. This, however, is not a necklace for preppies.


I call it my “Garden Plot” necklace and it evolved over time. I got the Right Angle Weave (RAW) frames for the stained glass squares figured out first, but then came the challenge of creating a component, a beaded something which harmonizes with your focal pieces, which I always have trouble with. How to join up the frames? It may be that by the time it came to join them I was tired of all those right angles and my subconscious coughed up a variation – beaded circles.


Of course, these are RAW circles, so my subconscious wasn’t going completely off the rails.

Here’s what the back looks like. Sometimes that can be as interesting as the front of a piece of beadwork.


I’m showing you this because quite often I get really hung up doing multiple rows of Right Angle Weave and they end up looking like they decided to rugby tackle each other. I’m not showing you the one where that happened! This is a modest, well-behaved piece of RAW.