Sunday, December 11, 2016

Let’s Get Ornamental

Art Bead Scene is having an ornament blog hop and I decided to participate. While I’m not the kind of person that wears a reindeer sweater and decks the halls much, I do like to make ornaments. At Thanksgiving I made my mom happy by decorating the ancestral Christmas tree when I was home (hi Mom!). Which tree is about 500 years old and made of antique wire and the branches from some kind of Bakelite celluloid alloy. It’s falling apart, but my brother Doug keeps putting it back together, and that tree goes up another year.

It is covered with many, many ornaments that I have made. There’s a whole set dating from 8th grade Home Ec class. Another set I cross-stitched. Several date from my Temari Ball days. When I started getting really crafty (in the creative not the scheming sense) Mom asked me to make gingerbread-style ornaments out of Fimo depicting each member of the family. The tree is wrapped in several yards of strung Moravian paper stars that I patiently made over several Yuletides.

This year I have gotten into beading with brass filigree stampings, which, as Dave Barry used to say, would be a great name for a rock band. But just working with brass in its raw state got a tad unvaried, so I bought some Vintaj paints and had some fun.  I painted the brass stamping with the “Emerald” paint, which turned out to be a lovely Christmas green. Then I spread on some matte glaze, which made for a nice contrast to all the bling I stitched onto it.

So here it is. Mom, if you’re reading this (and not just scoping out the pictures) I’m bringing it down when I come.


Be sure to check out what other people made by visiting the Art Bead Scene blog December 12th.

A lovely holiday season to you all and see you in the New Year.

Thursday, November 17, 2016

Shard Art

When my friend the stained-glass artist cut some cabs out of stained glass for me, there were these leftover shards of beautiful dichroic glass. I certainly was not going to let those go to waste so Beth polished them too. Their shapes attracted me right away and they proved an excellent fit with some oval 18 x 24mm Lunasoft cabochons.


It was like beading candy – I couldn’t get enough of them.


                                                                           YUM!!!

Thursday, November 10, 2016

Dichro Delights

One of the pleasures of working with stained glass cabs is that you can find dichroic versions. Dichroic glass (ahem, tuning up the ubiquitous but useful Wikipedia music here) is made with two different colors, which shift in the light as it moves. It’s done with metals, so those colors really blaze, which satisfies my bling-y urges. I have lots of dichroic fused glass art beads but imagine my delight when I encountered scrap bags of dichroic stained glass at the local shop in Frederick, MD.

My friend Beth, the stained glass artist, took me there and we both lit on one large piece of dichroic glass. But she got to it first and bought it, so I made a deal with her. I’d make her a necklace with the cut cab shape of her choice if she gave me a cab of the stuff to make something for myself.
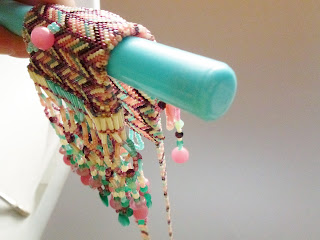
Here is Beth’s necklace:


Well, it will be a necklace. No wait, it is now a necklace. I forgot to photograph the final result.

This was also a fun design challenge – beading around sharply-pointed corners.  I knew I wanted to create a frame of beaded tubes with a pattern that riffed on the cab’s colors and effects but what the heck should go around those acute angles? Cubic Right Angle Weave to the rescue again!  I beaded two “V’s” in bronze seed beads and they fit perfectly. For the third angle, I got the idea of letting some fringe spill out of the two tubes, and made sure they were dripping lots of Swarovski crystals.

So what did I do with my cab?


Ta-DAH!!  This was a design that grew out of my summer exploring some Contemporary Geometric Beadwork stitches (a post for another day). These photos, alas, do not do that dichroic glass justice.

And there was an added dividend, which I will show you in my next post.

Thursday, November 3, 2016

Finding Your Beading Thing

That's a rather clunky title but given that I bead all over the place - trying new stitches, patterns, etc., I realize I have an addiction to variety.  But mastery, and artistry, comes to those who do find a (beading) voice and stick to it.

My thing has become designing with stained glass. It all started with my friend Beth, who is a stained-glass artist. We did a trade or two. She made me a gorgeous stained-glass panel in teal and orange that hangs in the front window of my house to go with the colors in that room.

Here's what I made her, a split-loom necklace with a phoenix pattern I found in one of my cross-stitch pattern books:


One time I showed her a beaded cabochon I had done with a large crystal that had no foil on the back. She immediately imagined building a stained glass window around it and our first collaboration began.


 Not the best photo, but my beaded cab has been stitched to three metal rings soldered to the inner circle of this stained glass window.

I made another large pendant in turquoise and amethyst and Beth made a wonderful window to frame it, soldering two metal rings for attaching it. It took me probably 6 or 8 months of looking at it to finally decide how I wanted to do that. I used an expanding herringbone stitch to create a band to cover the metal loops, with crystal rondels stitched through it and the metal ring like a sandwich to keep the beadwork in place and add another embellishment.


I wish the photos were better – it turns out there's something more difficult to photograph than beadwork.

I'll be posting a lot more on working with stained glass. This turned out to be the beginning of an absorbing exploration of a new beading medium.

Thursday, October 27, 2016

Letting it Lie

I have talked about the Drawer of Unfinished Projects and what goes into it (you can find my post here). But there are other projects that, when left to lie around, percolate and produce something I really like. This may take weeks, months or sometimes years, but the result is worth waiting for.

This happens, for example, when I work with my stained-glass artist friend Beth on a design that combines both media.  It can take a while for the solution to setting a bezeled crystal in her stained-glass piece to materialize but I have found that it would come if I waited and didn't worry it too much.

I dragged my feet on another collaboration with her because of the subject matter. It was a lovely iris set in an octagon of green glass.  But it had a spider in her web in the center. That was my part of the work and I loathe spiders. It took me a long time to even begin to think about making one, shudder, shudder.

I finally looked at some beaded spiders on the internet (much more congenial than looking at photos of real ones, which I would have had to do peeking through my fingers or taking my glasses off) and beaded one. It made no pretense to being anatomically correct, as the bead artist would, in its making, have thrown up on it.

The spider's web was more fun. Looking at how a spider builds its web was fascinating and there were some nice (no spiders included) tutorials on how to make or draw one. Here’s a quick-and-dirty photo of the piece, with web, sans spider:


 Another piece that I can remember letting lie around involved a gorgeous polymer clay cab I bought from Chris Kapono at Mandarin Moon designs. I wanted to do it justice and intended to make it the center of a piece of bead embroidery. I sketched a few designs and even began stitching the border around the cab but I didn't like it and decided to let it lie. It did so for a good two years, becoming a familiar part of the Bead Room décor.

Then one day the solution popped into my head: this is what you need to do. I drew a sketch and traced it onto the felt and I finished it in days. Here it is:


So, lying around can be a good thing!


Thursday, October 20, 2016

The Drawer of Unfinished Projects (DOUP)

Some beaders may throw up their hands when a piece isn't working, step away from it, come back, rip it apart and start over - sometimes more than once until they get something they can live with.

I'm not much of a rip-it-up and start over sort of beader. I tend to doggedly continue on a piece even when it isn't working out in the hope that I'll be pleasantly surprised at the end. Also, I hate to waste beads and my time. Uhm, wait a minute, I think I just belied myself.

At any rate, all beaders have a drawer (OK, drawers) full of unfinished projects. Sadly, hardly any project I put in there ever makes it out to become a finished piece. I'm not sure why. Probably because they all bear the burden of way too much time spent on them for not enough return. Maybe as I get older I realize I don’t want to be found dead in my bead room with a reject in my hands. Time gets pretty tyrannical as we use it up.

But I came to realize that my DOUP functions as the bead equivalent of a diary:  Oh yeah, I was really interested in that stitch at one time - look what I was trying to do with it. These projects are stepping stones in my beading education and for that I treasure them. They show me where I've come from and how I got here.


There is another class of unfinished projects that are in bead limbo.  I haven't consigned them to the DOUP, but I'm not that interested in working on them. Yet they still have a faint glamour of possibility that makes me keep them Out Here in the bead room.  Some have been sitting out for years but do eventually get finished.  Others are elaborate projects by some of my favorite bead designers that involve making multiple, varied components and are victims of Enough, Already!  Syndrome, where I spend hours and hours of beading something and, just when the light really is at the end of the tunnel, I lose interest. Why do I do this? Only a few more hours are needed, finish it!  Then you can wear it!  But alas, perversity will have its way.

I think this is the mentality of someone who has a different day job than beading. Mood and whim are the attraction and bane of beading for fun.  I know there are a whole host of other banes and attractions if you bead for a living, but that’s someone else’s post to write.

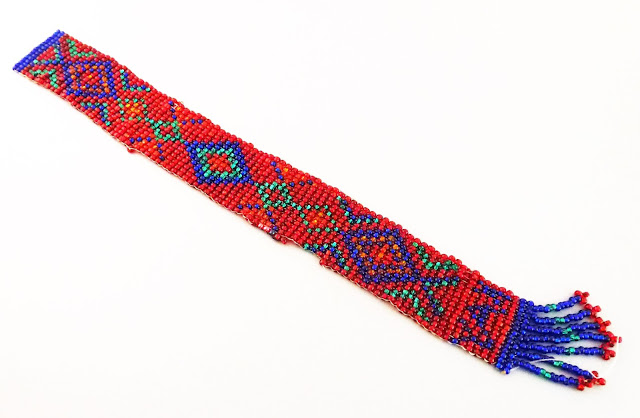
Here’s one piece that will probably never be completed as I don’t do much bead looming any more. It’s been useful as it is for when I do presentations about beadwork to groups – a ready-made example of a work in progress. Forever and ever.


Thursday, October 6, 2016

Bead Mash Up:  Ellad2, meet Sabine Lippert

One of the great things about learning beadwork is the availability of so many cool bead patterns to try.  It is one thing to buy a finished piece of jewelry, but quite another to see it and long to make one yourself.  This is the lust beaders know well:  How did she make that? Can I make that?  Often, once you get the pattern, you smack your head and say – “of course! It’s so elegantly simple!”  Though frequently the pattern is elegant but not simple and then you are even more impressed, though sometimes also frustrated and, occasionally, weary.

Two designers who never disappoint (as my bank balance will attest) are Sabine Lippert of trytobead and Ella of Ellad2. They have a great feel for design and construction where beads are involved and I learn a lot from making their patterns.

Sabine Lippert's "Radiant Wheel” pendant appeared in the June/July 2013 issue of Beadwork. The pattern can be found here.  The component involved beading a bezel, or sheath, around a crystal pointed-back stone and using several of these components to stud a beaded wheel base. It gives the look of a gathered beaded ribbon flowing over and under the crystal settings.


I liked the little stud components and hit upon using them as part of another artist's pattern I was working on, Ellad2's "Anais" brooch, which you can find here.


I found that the studs could lie in a flat row as well as fit around a circle, and they formed a fancy bail on which to hang the pendant. This happens a lot when you consume bead patterns like candy. You get to know a pattern or a component well enough that you start thinking about how it would work with something else.

Here is the result. The Twin bead chain is my own design.


Thursday, September 29, 2016

Choosing Colors

How often have I held a tube of beads in my hands, of a beautiful or unusual color or finish, and resolve: I am going to make something with you!  And how many times does it not happen?

Sometimes it does work out – where I have a color to start with and I just start matching other tubes with it. Often a color will “pop” against it, or an unexpected pairing will make me go “ooohhh, yeahhh” - which is one of the moments beaders live for.

But generally I find that as much as I want to use this color, these beads, right now, the search frequently winds up in a dead end.  My lesson is: you can’t force a color on yourself. Despite the many challenges bead bloggers make to their readers – make something with orange! Use a color you hate! – it doesn’t work for me.  I want to color outside the lines as much as anyone who has a monster bead stash. Not only aesthetically, but practically I want to use those beads I bought.  But alas, the colors dictate more than I like to admit.

Color tastes change too. When I started out beading I was the Bling Queen. The shinier, the gaudier, the more I liked it. If the beads weren’t silver-lined, I wasn’t interested. I privately referred to this preference as “bordello chic,” though I hasten to add that I have never been in such an establishment so please don’t get any ideas!  I expect it came from watching the marvelous Régine in “The Seven Per-Cent Solution” as an impressionable young person.

My color preferences have expanded over the years and embraced a somewhat more muted but I like to think more complex palette. This is the result of the Raku Revolution in bead manufacturing – of creating beads that have that amazing finish.   Like these:


Photo from Baubles and Beads

These days I let the focal beads I’m working with do my blinging for me. That also pares down the palette decisions, an added bonus.

To show you what I mean, here’s a piece of embeadery (my term for bead embroidery – check out my Pinterest board under that title) done around a polymer clay cab by Chris Kapono of Mandarin Moon, whose work is largely responsible for the drool marks on my laptop. I wore this piece to a bead show and one of the exhibitors said it looked like a peacock. Hah! No surprise there. Now of course I can’t see anything but the peacock when I look at it. Ah well.

So yes, I still do bling, but with dignity.


Thursday, September 22, 2016

Design Ideas and That Pinterest Board

In an earlier post, I talked about using Pinterest boards to house images of jewelry that I go to for beadwork inspiration – you can check it out here (board) and here (blog).

Today I'm featuring a design that lent itself to being reinterpreted in Cubic Right Angle Weave.  It is a SilverSilk Necklace designed by Hans Bennion, and can be found here.


But once I started beading, the design had its own ideas. 


And, being a beader, I couldn’t leave it unembellished, so I added some cushion cut Swarovski crystals in the center squares.  The color of the middle one is called White Opal Sky Blue and has been discontinued, to my regret. On the other hand, it can result in a little thrill when I come across some still for sale and reflexively hit the “Buy” button.


And you can see again why I like working with pewter gray so much.

Friday, September 16, 2016

Blue Waters

One of the things I resolved to do upon starting a blog was to respond to bead challenges put out there by other bloggers I followed. I’m not very good at keeping deadlines when it comes to beading. Beadwork should ebb and flow and get done when it gets done. Otherwise it becomes beadWORK.

But when a challenge is timely – both in theme and deadline – I found I could do it, and with pleasure.  This would be Love My Art Jewelry’s Caribbean Color Palette Challenge. Sherri Stokey offered a luscious photo to inspire readers:


Only a beader’s heart would beat faster seeing a mess of tubes and strands. And those lurrrrvvely art beads.

One of the things I liked about Sherri’s palette is that it included a color I don’t work with much, white.  I’ve always found it boring and you have to be careful about what color of thread you use with it. White also tends to pop; it’s a muscle color and likes to throw its weight around.

I knew immediately what I wanted to make. I have been doing a lot of bead embroidery this past year, using the new Czech shaped beads that have been blitzing the market: two-hole beads, four-hole beads, triangles, squares, crescents, as well as wild new finishes -  mottled, shiny, matte, you name it.

I found that these shaped beads fit quite snugly around one of my favorite types of cabochons to bead with – Lunasoft cabs. These are made of Lucite with a metallic backing that makes them glow. I also don’t hold with using plastic or acrylic beads in my beadwork, but I make a tremendous exception for them.


I call this “Blue Waters” and kinda wish I was dabbling my toes in the surf on a balmy beach somewhere, now that autumn is flowing in. Just a last taste of summer, please.

Check out what others created over at Love My Art Jewelry, which can be found here.

Thursday, September 8, 2016

Cat Hair

One of the joys of going public with one's beadwork is taking a nice juicy photo which looks great on the viewfinder of your camera, only to get this when you blow it up:


 Cat hair. Yikes!  It showed up even more on the back of the piece:


But how can I have a bead room without a cat in it?  My cats have all been great about my beads and I have woven a bit of them into most everything I make. But you don't want so much of it that you find yourself becoming a weaver of cat hair rather than beads.  One of my rituals on sitting down to bead is to run an Extra Sticky Pet Roller up and down my shirt and over my bead mat. Otherwise I'll spend too much of my evening engaged in the beading equivalent of picking corn silk out of my teeth.

I realize that cat photos on the internet are as trite as glitter-spouting .gifs but thought I would share some today. My furry guy loves to leap up on my beading lap desk and investigate what I'm working on and here he is checking out a Japanese ribbon embroidery bracelet I made from a class I took with Sherry Serafini at Bead Soup in Savage, Maryland.


Those are my stockinged feet down there.


That’s right, eat that shibori ribbon and throw it up on the carpet later, good boy.

Thursday, September 1, 2016

Urban Chic

My color palette tends towards turquoise, purple, chartreuse, with gold and copper. But I have a thing for pewter grey. It works well with bright warm colors like orange and red. Here is a design I created to make use (yet again) of some big beads I fell in love with. I found these at a bead show and they seem to be a compound of pressed and polished glass or gem fragments and are known as mosaic beads. I don't see them much anymore so if anyone knows where to buy them I'd be interested.

What to do with them? Cubic Right Angle Weave to the rescue!


Prior to designing this necklace I had taken a wireworking class with Deryn Mentock called "Link Love" at Art Bliss so I was exploring wire more and you can see that I found a way to work that in here. I call this piece "Chain Link."


Thursday, August 25, 2016

Finding Inspiration

One of the best pieces of advice I got from a beading listserv back in the mid-1990s was to seek inspiration from jewelry in fashion magazines. The person posting particularly recommended the Vogue jewelry magazine Gioiello.  On my next trip to New York I went looking for an issue.  After gasping at the price I plunked down my cash and later curled up with it in my hotel room. What fabulous images and ideas unfolded. I gazed at weirdly-gotten-up models, cluttered settings where you had to search for the jewelry, like those optical illusion panoramas popular once upon a time: can you find the six hidden brooches?  But the jewelry, the jewelry!  I gave it the ultimate accolade - I set up a manila file folder for pages I x-actoed from it.

As the web morphed from a medium full of texts to one full of images, I began copying and pasting images I found online into a Word file on my laptop. I had about 2 dozen such files when I finally decided to stop resisting and set up a Pinterest Board. After the usual "this is great! Why didn't I do this sooner?" reaction I now have a board where I put all my fashion jewelry inspiration. I call it "Jewelry Inspiration for Bead Design" and you can find it here.

One never knows what will do the trick of inspiring a design. But here's one that did it for me.

I used to do a lot of loomed beadwork until it got too hard on my wrists. After making bracelets and bookmarks, I wanted to create a larger loomed piece to hang on a wall.  Believe it or not, this photo gave me the idea for a design:


What was it that caught my attention? The fingernails.


 I liked the combination of an abstract backdrop with bold dark slashes (hashtag, anyone?) and the gold/brown palette with hints of bright red and blue (this photo doesn't show that very well, I admit).

And here is the result, a piece I titled "Fragment."


You just never know what will lasso those eyeballs into taking a second, considering look.

Thursday, August 18, 2016


Blame it on Barb

Barb is my roommate from grad school. She became a doctor, I became a professor.  We mostly lived in a one-bedroom apartment - I had the living room, she had the bedroom. That was back when we were young and penniless, living on stipends and student loans. We had the requisite grad-school furniture: cheap chests of drawers, a dinette set, and a cinderblock book case, though not the cable spool table. We had some standards.

Barb and I have had some fun travels over the years (decades). One of the most memorable was the time she took a temporary stint at a practice in Juneau, Alaska for six months in the summer of 1988.  She invited me to join her (and her four little dogs) on the trip out, and we drove her Toyota Celica from southside Virginia to Seattle, where she had booked us on the ferry up the Inside Passage to Juneau.

One of the things Barb did while in Juneau was take some beading classes and she sent me a pair of brick stitch fringed earrings and a loomed bookmark.  I could not stop handling them. I still have the bookmark and you can see it has gotten frayed.  I am the cause of that fraying, not the passing years.


                            I just noticed a flaw in my photo - can you see it?

 I was so taken with this beadwork that I began looking for books on fringed earrings. Then someone gave me one of those little Native American bead looms and that got me started on what became a passion for loomed beadwork. Now Barb owns some of my beaded jewelry, as does her daughter, Allie. It's lovely to see my beads on friends.

But every time we get together I tell her she's the reason I'm now a pauper. A happy, happy pauper.

Thanks, Barb.

Thursday, August 11, 2016

Cross Stitch and Cross Fertilization

I am besotted with Cubic Right Angle Weave (better known in the beading universe as CRAW). For I while, when I first encountered the stitch, I just made ropes using it, varying the size and type of bead. But one summer, once school was out, I got the idea of turning corners, or using Cubic Right Angle Weave to make Right Angles! 

Such a small thing, but it had a tremendous creative result.  I found I could think about CRAW as being like cross stitch (which was my first stitching obsession back in the 80s) and it was easy to count by units when designing: one square, one CRAW stitch.

Here is one of the first CRAW pieces I created using PC Stitch, a cross stitch software program (which I have also used for creating loomwork designs).

As you can see, I also figured out how to add a rivoli crystal or two - CRAW converts easily to peyote stitch. The trick for me was to create a web on the reverse side so the crystal would be firmly supported and not wiggle around. Or push through the back and fall out!  


The smaller crystals are Swarovskis in sew-through settings, another component that is very CRAW-compatible.

Thursday, July 28, 2016

Beading down Memory Lane

Being a woman of middle years, I came late to the digital revolution.  Back in the mid-90s, when colleagues at the college where I teach were getting online I held out:  e-mail and all that stuff was a time-sucker and a fad.  Then of course I bit the bullet but resisted switching over from Netscape to IE back in the day.  And no Moodle for me and my courses, thank you very much. And as God was my witness I was never going to own a cellphone or have a Facebook page. Ah well…the irony is that every time I gave in and tried the new thing my response was the same: "Why did I wait so long? I love this!" Convenience doth make devotees of us all.

Where was I? Oh yes, the same goes for beadwork. Those of us who have been beading awhile can see the fads, the vogues, the revivals. When I began beading in the early 1990s amulet bags were all the rage. I well remember the Bead and Button issue (August 1994) that featured Carol Wilcox Wells' beaded bags and how to make one.

Up to that point, as usual, I had resisted the Delica siren call. I didn't want to invest more money in a new type of bead (yeah, this was a long time ago, I know better now). But I wanted to make a bag and Delicas, with their mosaic effect, were amazing to look at.  So I caved in, bought some, and made my first bag based on Carol's article.  I decided to use a repeating pattern so I could focus on the stitch and here is the result:


I call it "Prom Dress" as the fringe (I got a little carried away) made a fancy flaring skirt on the body of the bag.

And here's another photo showing my weak tension.  I could have had a nice job beading watches for Salvador Dali to paint.


   On the other hand, there are times when I wish I could summon up my younger beading self because tight tension does not always a successful piece of beadwork make. Gentle beading indeed!

Thursday, July 21, 2016

Bead Addiction 

I spend a lot of my hard-earned cash on beads and every now and then make attempts to retrench. As with trying to lose weight, both are equally futile undertakings, generally.

I have pursued other arts and crafts. A trip through my bead room reveals an elephant's graveyard of passions past: rotting plastic canvas, snarls of  DMC floss, pockmarked stretcher boards, shedding Styrofoam balls and pearl cotton (from my temari days).  But beads eventually swamped and drowned my other interests, and their remnants on occasion were ruthlessly abandoned to local yard and charity sales (though I have hung on to the giant cross-stitch pattern of a lady and unicorn medieval tapestry, because You Never Know). 

A couple of times in my odyssey I have broken with beadwork, even became a tad bored with it, though in retrospect it all seems part of the process of developing an addiction.  An addiction to working in a wonderful, creative field of art and craft, but still, I was caught.

The most recent time I swore off beads came not from boredom but fright. Back in 2008 when I had first discovered Etsy in a big way I began buying, buying, BUYING. I set up a Paypal account and away I went.

Then one day I got a notice from Paypal that I was well on my way to reaching my spending limit, at which time I would have to get "verified" so they could help themselves directly to my bank account rather than continue paying by credit card.  I was shocked, shocked, that I had spent so much money on beads.  I went on the wagon and swore off buying and beading, cold sweat, the GT's (globus tremens), everything.

I fell back on my first love, needlework, and started a fairly involved design I had bought in a nostalgic visit to a needlework show - a last fling with an old flame. 

How long did it last before the siren call of beads and that voice in my head prevailed?  That tells me it's OK to eat that extra slice of pizza and respond with enthusiasm to that online blowout bead sale? I went back and checked my records and it looks like it was… 6 weeks?  That may have been when I realized Hello, my name is Kay, and I'm a bead addict. I haven't looked back.

My needlework past does contribute to my beading present though. Here's one example where I used one of my books on bargello stitch to graph the pattern for this split-loom necklace:


And just remember: you can never be too rich, too thin, or have an adequate bead stash.

Thursday, July 14, 2016

The Big Bead Treatment

The past couple of posts I've shown you beading with large beads and beaded components. Having messed around with this technique to my satisfaction, I flitted went on to other beading ventures. But it formed a chapter in my beading life that came back to pleasantly haunt me.

Later on, when I was trying to find a way to use the biggest Czech spike beads in a design, those 18x12mm howitzers, that caging technique came in handy. I also used some more of the big turquoise faceted beads I had left over from my original caged bead project. This is deeply satisfying to a beader - using things up. It gives us a sense of virtue (waste not) and an excuse to buy more beads (want not).

Here’s the result. I call it my Big Bead Odyssey:


And a close up:


OK, that's it on caging big beads.  I’ve scratched that itch to last awhile.

Thursday, July 7, 2016

Bead Fever

In my last post I showed a variation on caging large beads with beaded components. Here's another one.

Why? Because no beader can ever bead just one version of something, they have to bead more. Part of this is the fever of acquisition. You get into the moment of learning something new with cool colors and embellishments and suddenly you have to have a stash of beads to create more with them right now.  In the old days you went to the craft store or waited impatiently for the newest bead catalogue to arrive (which some companies made you buy, can you believe that?).

The internet has had a deplorably enabling effect on this impulse, which has contributed to the beggared state of my bank account. But what a thrill to acquire shiny new beads, and accent beads to go with, maybe books and patterns, and before you know it, you have created a new classification in the Dewey Decimal system of your bead room. Mine is more of a Demented Decimal system, but, like my office at work, I know where everything is.

So, having figured out how to cage my large beads between beaded components, I wanted more large beads. I found these faceted turquoise-colored beads at a bead show and have a feeling I was probably overcharged for them, but I loved the color and, well, bead show:  the beading equivalent of an opium den.

Nice color, eh? And these photos definitely do not do it justice. 

I again used Aleta Ford Baker’s “Indespiral” pattern for the strap, and you can find her tutorial here.

Here’s a close up of the strap join:


Next time: So what else can I do with all these big beads I bought?

Thursday, June 30, 2016

Running With It 

Last post I showed you how I figured out how to use a large art bead by caging it between two beaded components.  I had some other large beads that I enjoyed admiring but didn't know what to do with and, well, now I did.

Around the same time, my beading buddies Bobbi, Karen and I were working through some of the patterns in Rachel Nelson-Smith's Bead Riffs. Her "Groove" pattern of six-sided earrings uses a built-up Right Angle Weave variation. It gave me the idea of making a five-sided unit with a netted inside "spoke" that would hold and keep stable a large bead.

Here's the result, a bead spacer for large (18 x 61mm) beads.
.


Here's a close up:


The strap is Aleta Ford Baker's "Indespiral" variation on tubular peyote stitch. You can find her tutorial here. It was fun figuring out how to attach this spiraling peyote tube to the beads and spacers for a seamless (well mostly) look. I did run a length of 14 gauge wire through the beads and spacers for more strength and stability, creating a loop at each end, which I covered with beads.

Thursday, June 23, 2016

A Little History

One big motive for starting this blog is that I have reached a point where I feel I have something worth saying and showing about beadwork. I began beading before the digital age, and subscribed to Bead and Button within the first few months of its appearing on the shelves in the mid-90s (back then it was found in places like Walden Books and B. Dalton). I taught myself out of its pages and by scouring bookstores and craft sales for other resources.

When the web came along I did bead swaps on Seed Bead Frenzy, my first experience with the wonderful online beading community, and found a local beading group through a listserv (South Central PA Beaders and didn't we have ourselves some great bead-ins).  Now I'm sticking my big toe into what is, for me anyway, the next new thing - writing a blog and sharing my work and my ideas on the web. I have gotten so much from my fellow beadwrights - from the magazines to bootleg Russian patterns (yes, I do confess to downloading some) to preordering the latest book by a favorite bead artist.

Some topics I hope to talk about in a semi-regular way:

Beading mashups. I learned a great deal from making other designers' projects and am always looking at how I can adapt and apply the techniques I learn.

Design challenges.  These might be challenges in figuring out a color palette, dealing with odd-sized beads or other bumps in the creative road that turned out well (or ill).

Memory Lane.  I’ve been beading long enough for that path to stretch quite a distance. 

Inspired By… Featuring images that got me creating and the result.

Today - a design challenge. I love peacock motifs and fell for an art bead that featured them several years ago at a bead show. Sad to say, I do not remember who made it (if anyone who sees this has an idea, I'd love to hear from you). 

Most of us with a bead stash are familiar with the ritual of taking out our collection of art beads, gazing fondly at them…and putting them away again.  I have a drawer (OK, drawers) full of these and it is always an achievement when I figure out a way to create a piece of jewelry around them.  I really wanted to wear this bead and on my ramblings through my files I found a pattern that gave me the answer.

Here's the original design, and you can find the pattern here.


I call it the Satellite Pendant because it looks a bit like a UFO. It is basically two fancy bead caps stitched together, but it struck me that my bead would fit very well between the two caps.

But I also needed to anchor the big bead to each cap somehow, so I used size 15 seed beads to join the two halves to each other with the big bead sandwiched between. This also would stabilize the peacock bead - it's a big bead - so it wouldn't wobble around.

Here's the result:


I wore this later to a bead show and one of the exhibitors identified the artist and said "she's here and you need to show her that."  So I did and the artist gave me the ultimate compliment of snapping a photo, saying she really liked what I had done with her bead.  This is the "ahhh" in beading, when you get it right.


Thursday, June 16, 2016


Ahhh…Beading

Hello, and welcome to my blog, The Gentle Beader.  Beads are calming, despite the views of non-beading folk (shall we call them buggles?), who invariably ask when viewing the work of a bead artist "how do you have the patience to do that?"

Beading isn't about patience.  I save my patience for other things in life that really need it. I sink blissfully into beading the way a dog sighs after that third turn of her tail and flops down.  If I have a mantra it is "Ahhhh….beading." The kind of challenge beads and bead designing offer me turns frustration into giddy exploration and lights my creative fires.

The Gentle Beader also evokes “The Gentle Reader" and I like that association with an earlier, less hurried way of living. The hurly-burly of the connected age can be overwhelming - beads persuade me to slow down and appreciate what I am making. Beads are gentle and endlessly repay my fascination with them.

Here's a piece I recently finished. I love bead embroidery and had some leftover beads from another project.  Using my favorite bead stitch, Cubic Right Angle Weave (CRAW), I joined a length of CRAW squares into an oval to serve as the frame, tacked it down on a square of Easy Felt, filled it, and then created a scalloped edging using herringbone weave.

                                                   I call this my "Basket o' Beads" pin.


I should note that I am not a Gentle Photographer but am learning, slowly, to take decent photos of my work. This has been the biggest hurdle to, well, everything - blogging, sharing, teaching - all the things I'd like to do more of as I bead along.

Thanks for reading and see you around the beading universe.